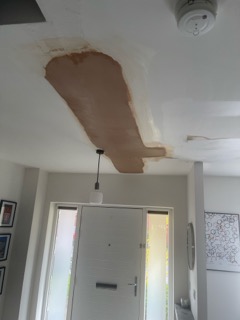
How Long Should a Ceiling Dry Before It’s Repaired?
One of the most common questions we receive at Cooper Plastering is:
“Can you repair it straight away?”
The honest answer is: it depends.
Many people assume that as soon as the leak has been fixed, the plastering work can begin. In reality, the ceiling needs time to dry properly before any permanent repair is carried out.
The drying time varies depending on:
- How much water entered the ceiling.
- The type of ceiling construction.
- Whether insulation above has become wet.
- The temperature inside the property.
- The level of ventilation.
- How quickly the leak was discovered.
A small leak from an upstairs radiator pipe may dry within a few days, while a ceiling that has been saturated by a roof leak over several weeks may take considerably longer.
At Cooper Plastering, we never rush this stage. Repairing a ceiling before it’s dry can trap moisture, increase the risk of future staining, and reduce the lifespan of the repair.
Signs Your Ceiling Is Ready for Repair
Before we begin work, we look for several indicators that the ceiling has fully dried.
These include:
- No damp patches remaining.
- No active staining spreading.
- The plaster feels solid rather than soft.
- No moisture readings if tested.
- No further movement or sagging.
If the ceiling is still damp, we’ll always advise waiting rather than carrying out work that may fail later.
It’s far better to delay the repair by a few days than risk having to do it all again.
Will the Brown Water Stain Disappear?
Unfortunately, no.
Once water has stained plaster, the discolouration usually remains.
Even after replastering small repairs, old stains can often bleed through ordinary emulsion paint if they haven’t been treated correctly.
For this reason, we recommend using a quality stain-blocking primer before redecorating where appropriate.
The important thing to remember is that the stain itself isn’t necessarily a sign of ongoing damp. It simply shows where moisture has previously travelled through the ceiling.
Should You Claim on Your Home Insurance?
This is another question we’re regularly asked.
The answer depends on:
- What caused the leak.
- Your insurance excess.
- The estimated repair cost.
- Whether there is additional damage to decorations, flooring or contents.
For example, if a burst pipe has caused damage to several rooms, an insurance claim may be worthwhile.
However, for a relatively small ceiling repair costing a few hundred pounds, many homeowners decide it’s more economical to pay privately rather than risk increasing future insurance premiums.
Every situation is different, so we always recommend speaking with your insurer before authorising any work.
How Much Does Water Damaged Ceiling Repair Cost in Warwickshire?
Naturally, every ceiling is different, but homeowners often appreciate a realistic guide before requesting a quotation.
Typical examples include:
Small patch repair
Suitable where only a limited section of plaster has failed.
Typical price: £200–£350
Medium ceiling repair
Removal of damaged plasterboard, localised reboarding and full skim.
Typical price: £350–£650
Complete ceiling overboard and skim
Where the existing ceiling has widespread damage but remains structurally suitable for overboarding.
Typical price: £500–£900+
Full ceiling replacement
Where extensive water damage requires complete removal and replacement.
Price varies depending on:
- Room size.
- Access.
- Disposal requirements.
- Lighting removal.
- Cornice or coving.
- Ceiling height.
The quickest way to receive an accurate quotation is simply to send us photographs by WhatsApp. In many cases, we can provide an initial estimate without even visiting the property.
How Long Does the Repair Take?
Again, this depends on the extent of the damage.
A straightforward repair may be completed within half a day.
Larger ceilings often take a full day.
Complete ceiling replacements can require two days depending on the size of the room.
Once plastered, we generally advise allowing 5–7 days for the plaster to dry naturally before decorating, although this may vary depending on temperature and humidity.
Can You Repair an Artex Ceiling After a Leak?
Absolutely.
In fact, this is one of the most common jobs we carry out.
Many Warwickshire homes built during the 1970s and 1980s still have textured Artex ceilings.
If water has damaged an Artex ceiling, there are several possible solutions.
Sometimes the damaged section can be repaired before the ceiling is skimmed smooth.
In other cases, overboarding provides the best long-term result.
If the Artex dates from before the late 1990s, it may contain asbestos. If there is any likelihood that the textured coating will need to be disturbed rather than simply covered, appropriate testing and advice should be obtained before work begins.
We’ll always explain the safest and most appropriate option after inspecting the ceiling.
The Biggest Mistakes Homeowners Make
Over the years we’ve seen the same mistakes repeated time and again.
Decorating too soon
Painting damp plaster traps moisture and often leads to peeling paint later.
Ignoring small cracks
Small cracks frequently indicate hidden damage behind the surface.
Repairing them early is normally much cheaper than waiting until larger areas fail.
Filling over damp plaster
Ordinary filler isn’t designed to repair water-damaged plaster.
If the background is weak, the repair is unlikely to last.
Trying to patch everything
Sometimes replacing an entire ceiling actually produces a better finish while costing very little extra.
Professional advice at the outset often saves money in the long run.
A Real Cooper Plastering Example
One recent project involved a family home in Hatton, where a leaking bathroom had caused extensive damage to the lounge ceiling below.
When we arrived, there were several visible cracks, water staining and a noticeable sag across the centre of the room. Although the leak had already been repaired by a plumber, the ceiling itself had deteriorated beyond a simple patch repair.
After carefully inspecting the structure, we recommended overboarding the entire ceiling rather than attempting to repair isolated sections. This created a perfectly level surface, strengthened the ceiling and removed the risk of future cracking around the old damaged areas.
The work was completed in a single day, with the room fully protected beforehand and left clean and tidy afterwards. Once decorated, there was no visible sign that the leak had ever occurred.
It’s a good example of how choosing the right repair method from the beginning can produce a better finish and avoid repeat work.
Coming up in Part 3
In the final part of this guide, we’ll include:
- Frequently Asked Questions (ideal for Google’s FAQ rich results)
- A genuine customer testimonial
- Why homeowners across Warwickshire choose Cooper Plastering
- Internal linking suggestions
- Image alt text recommendations
- SEO tags
- Meta description
- Social media post
- Full contact details and a strong call to action